English
 русский
 عربى
 Español


Plumbing Components Guide
A Comprehensive Guide to Basin Drains: Types, Structure, and Key Selection Criteria
A basin drain is a small part that quietly decides whether a sink drains cleanly, stays free of odor and looks finished. This guide explains how basin drains are built, which types exist and how to choose the right one for your project.
What a Basin Drain Is and What It Does
A basin drain, also called a basin waste, sink drain or sink waste, is the fitting that connects the outlet hole of a washbasin to the waste pipe below it. It looks simple from above: a small metal or ceramic disc set into the bottom of the bowl. Underneath, it is a precisely engineered assembly that has to carry water away quickly, seal against leaks, resist corrosion and, in many designs, let the user hold water in the bowl whenever needed.
Although it is among the least expensive parts of a bathroom, the drain affects daily experience more than most people expect. A poorly matched waste can leak into the vanity cabinet, drain slowly because of a restrictive throat, trap hair, or simply look wrong beside a carefully chosen faucet. Replacing a drain after the vanity is installed and tiled is also inconvenient, so understanding the options before purchase saves time and money.
A basin drain performs four jobs at once:
- Water removal. It provides a clear, smooth path from the bowl to the trap and waste line, sized so that the basin empties at a reasonable rate.
- Sealing. It creates a watertight joint between the ceramic, stone, glass or metal basin and the plumbing below, normally through a combination of a flange, a gasket and a locking nut.
- Water retention. Most designs include a stopper so the user can fill the bowl for washing, shaving or soaking small items.
- Debris control. Open grid drains and strainers keep large objects, such as rings or caps, from entering the pipe.
The same word covers a wide range of products. Residential bathroom basins, commercial washrooms, hospitality fit-outs, laboratory sinks and kitchen prep sinks all use drains, and each setting places different demands on design, material and finish. The sections below cover the common variations in detail.
Anatomy: How a Basin Drain Is Built
Knowing the parts makes it much easier to read a product specification, order a replacement or diagnose a leak. While designs vary between manufacturers, most basin drains share the same core components.
The Flange (Drain Head)
The flange is the visible top part. It sits in the recess around the outlet hole and covers the edge of the opening. Its diameter, usually between 60 mm and 80 mm for bathroom basins, determines how neatly it hides the cut edge of the hole. The flange also provides the sealing surface against which the gasket or sealant is compressed. On a pop-up waste, the flange has an opening in the center that holds the stopper; on a grid waste, the flange is slotted or perforated.
The Body or Tailpiece
Beneath the flange, a threaded cylindrical body passes through the basin hole. The thread allows a locking nut to pull the flange down tight against the basin from below. In many designs the body is slotted at one point to align with the overflow channel of the basin. The lower end of the body is either threaded for a standard slotted or unslotted waste connection or fitted with a tail that accepts a trap directly.
Gaskets and Seals
Two sealing surfaces matter. The upper seal sits between the flange and the basin surface, while the lower seal, usually a flat or conical rubber or silicone washer, sits between the basin underside and the locking nut. In a well-built drain, tightening the nut compresses these elements evenly without cracking ceramic or distorting the flange. Some manufacturers add a foam or rubber rim gasket to protect glass and stone surfaces.
The Locking Nut and Backnut
The locking nut is the component that actually clamps the drain to the basin. It may be plastic, brass or stainless steel. Larger-diameter wing nuts allow hand tightening in cramped cabinets, while hex nuts suit tool use. A properly tightened nut should feel firm but should never be over-torqued, especially against ceramic.
The Stopper Mechanism
The stopper is the moving part. Depending on the design, it can be a pop-up plug connected by a lift rod and pivot arm, a push-down spring-loaded cap, a simple rubber plug on a chain, or a fixed grid with no stopper at all. The mechanism determines how the user controls the water and is where most failures eventually occur, because it contains moving joints, springs and seals.
The Overflow Path
If the basin has an overflow slot, the drain body usually includes a matching slot or a ring that communicates with the overflow channel. This allows water to escape when the bowl is overfilled and also lets air enter behind the water, which helps the basin empty smoothly. Drains designed for basins without overflow have a solid body with no such slot.
Quick check
When you read a product listing, look for the flange diameter, thread size, body length, overflow compatibility and material. These five details tell you almost everything about whether a drain will fit your basin and plumbing.
The Main Types of Basin Drains
Basin drains are grouped by how the stopper works and by how the product is finished. The following types account for nearly all of the market.
Pop-Up Basin Drains
The pop-up waste has long been the standard in residential bathrooms. A lift rod behind the faucet connects through a pivot rod and clevis strap to the stopper below. Raising or lowering the rod moves the stopper up to release the water or down to seal the outlet. Pop-up drains are widely available, easy to match to faucets that include a built-in pop-up assembly, and simple to repair. Their downside is the linkage, which sits in the cabinet and occasionally needs readjustment or cleaning. The stopper also tends to catch hair around the central post.
Push-Button (Click-Clack) Basin Drains
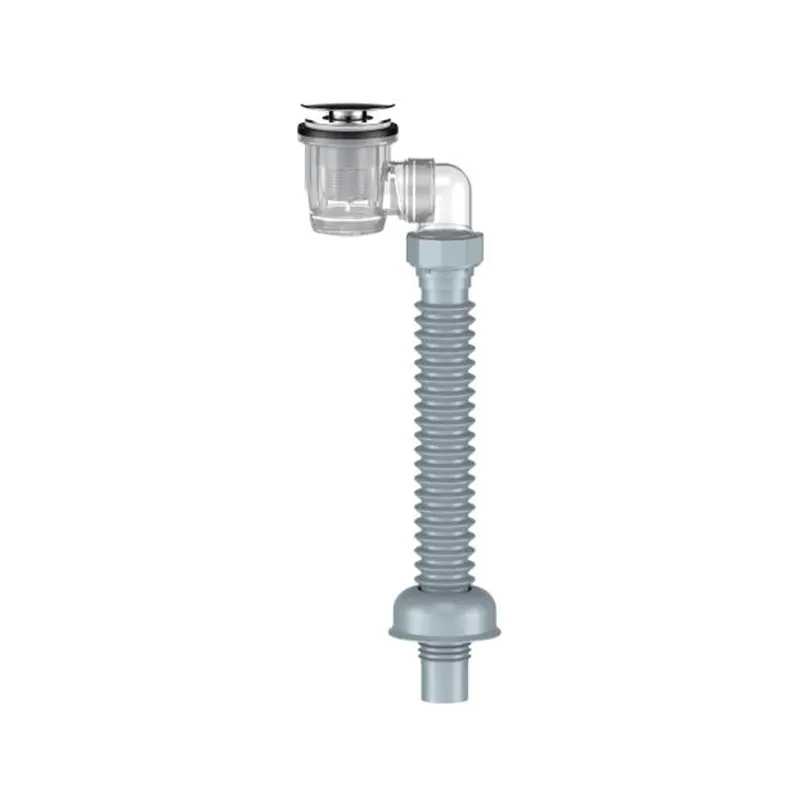
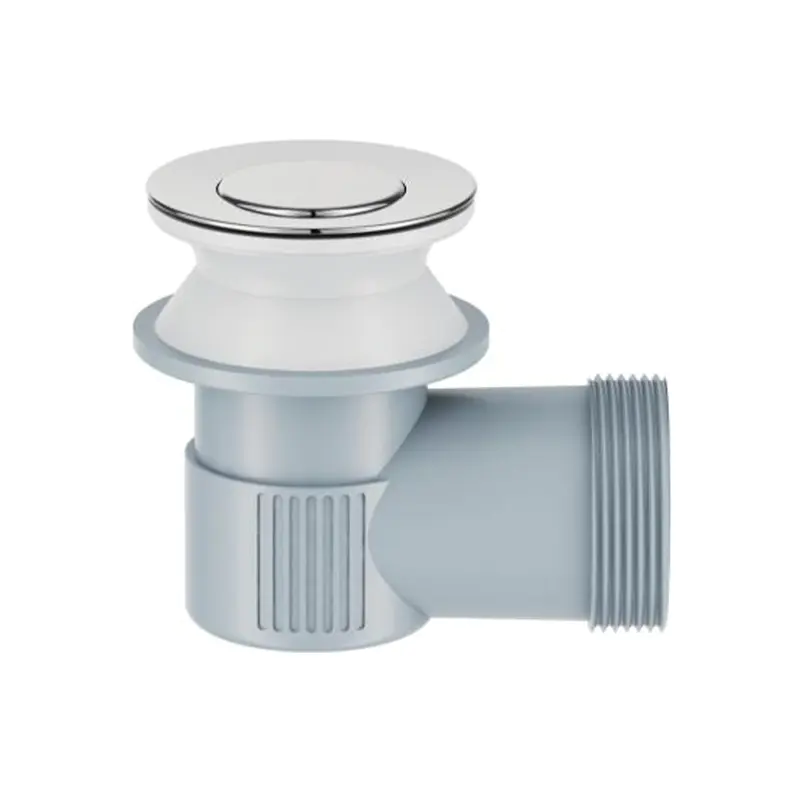
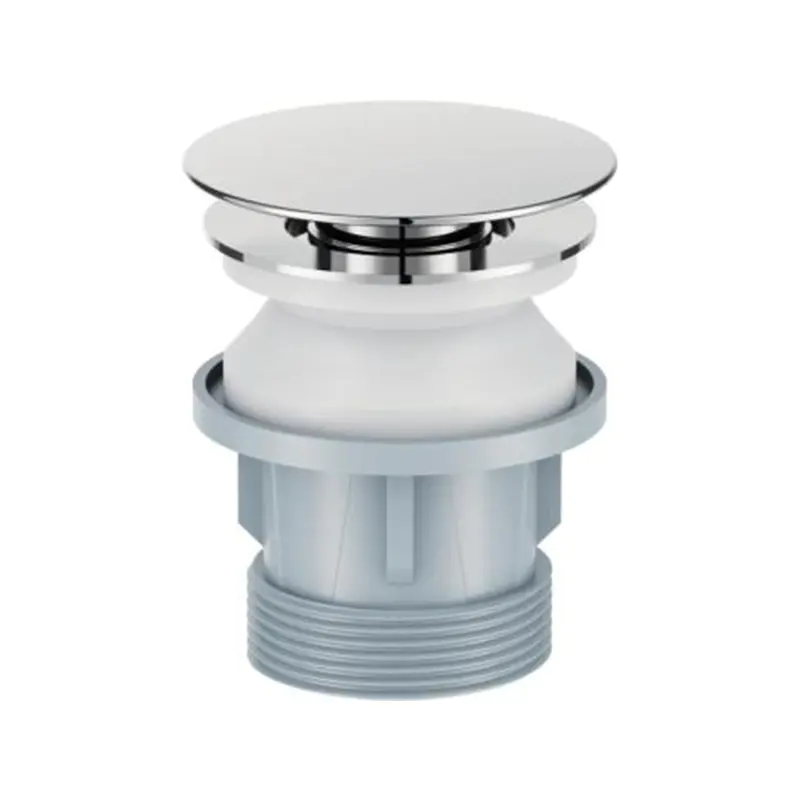
The push-button drain, often called a click-clack or sprung waste, uses an internal spring and a latch. Pressing the cap once locks it closed so the basin holds water; pressing again lets it spring up and open. There is no external rod, so the faucet is free of the lift-rod hole and the vanity looks cleaner. This design is popular in modern and minimalist bathrooms, in countertop vessel basins and in hospitality projects where simple operation matters. Quality varies widely. A good unit uses a stainless steel or brass mechanism and a tightly fitted seal, while a low-cost version can stick, leak or lose its click over time.
Free-Flow (Open) Grid Drains
A grid waste has no stopper. The flange carries a perforated or slotted grid that blocks large objects while letting water flow constantly. It is the usual choice for commercial washrooms, shared facilities and hand-wash stations where users do not need to fill the bowl. Because there are no moving parts, maintenance is minimal and failure points are few. It is also the preferred choice for accessibility-focused design in many cases, since users never need to operate a stopper.
Plug-and-Chain Drains
This traditional style uses a rubber or metal plug attached to a chain that hooks near the faucet or basin rim. It is inexpensive, easy to replace, and common in older properties, utility sinks and budget fit-outs. The plug sits in a simple, often unslotted waste with a visible chain, so it lacks the polished look of modern alternatives.
Slotted and Unslotted Wastes
This is a distinction of body design rather than stopper style. A slotted waste has an opening in the body that connects to the basin overflow. An unslotted waste has a solid body for basins that have no overflow. Choosing the wrong one is one of the most common ordering mistakes, and it can result in poor drainage or an overflow that does not work.
Unslotted Pop-Up for Vessel and Countertop Basins
Countertop basins, especially vessel designs, often have no overflow and a thick rim, so they need a longer body and a flange that sits cleanly on a flat surface. These drains typically include extended threaded bodies, and some are made as a combination with a decorative ring that conceals the junction between the basin and the countertop.
Quick Comparison
| Type | Operation | Best suited to | Main limitation |
|---|---|---|---|
| Pop-up | Lift rod and linkage | Standard bathroom basins | Linkage needs occasional adjustment |
| Push-button | Press to open or close | Modern, vessel and hospitality basins | Quality varies, mechanism can wear |
| Free-flow grid | No stopper | Commercial and public washrooms | Cannot hold water |
| Plug and chain | Manual plug | Utility sinks, older homes | Dated appearance |
Overflow Versus Non-Overflow Designs
One of the most important choices in specifying a basin drain is whether the basin has an overflow. This decision affects the waste body, the flange design and even the way the basin performs in daily use.
Basins With an Overflow
Many ceramic basins include a small slot or hole near the rim that leads into a channel behind the bowl. The channel connects to the waste outlet. If the water level rises too high, it flows through the slot and down the channel rather than spilling onto the floor. Overflow also introduces air behind the descending water, so the basin drains more smoothly and with less gurgling. For these basins you need a slotted waste whose slot aligns with the overflow channel, plus a seal that prevents water from escaping into the gap between the body and the ceramic.
Basins Without an Overflow
Modern basins increasingly omit the overflow for cleaner lines and easier cleaning. Overflow channels can collect residue, soap and bacteria out of sight, which is a hygiene concern in healthcare and hospitality settings. Basins without overflow use an unslotted waste with a solid body. The user must watch the water level, because there is no safety path if the tap is left running with the stopper closed.
Common mistake
Installing an unslotted waste in a basin that has an overflow blocks the channel, which makes the overflow useless and can trap stale water. Installing a slotted waste in a non-overflow basin can leak through the unused slot. Always confirm the basin type before purchase.
Materials and Finishes
The material of a basin drain determines its strength, corrosion resistance, appearance and price. Because the drain is in constant contact with water, soap, toothpaste, hair products and cleaning chemicals, material choice has a direct effect on service life.
Brass
Solid brass is the traditional choice for premium drains. It is strong, machines accurately, holds threads well and takes chrome, nickel, gold, black and brushed finishes. A well-plated brass drain can last decades. Look for lead-free or low-lead brass where regulations require it, and for thick plating that resists tarnish and peeling. Brass is heavier and more expensive than most alternatives.
Stainless Steel
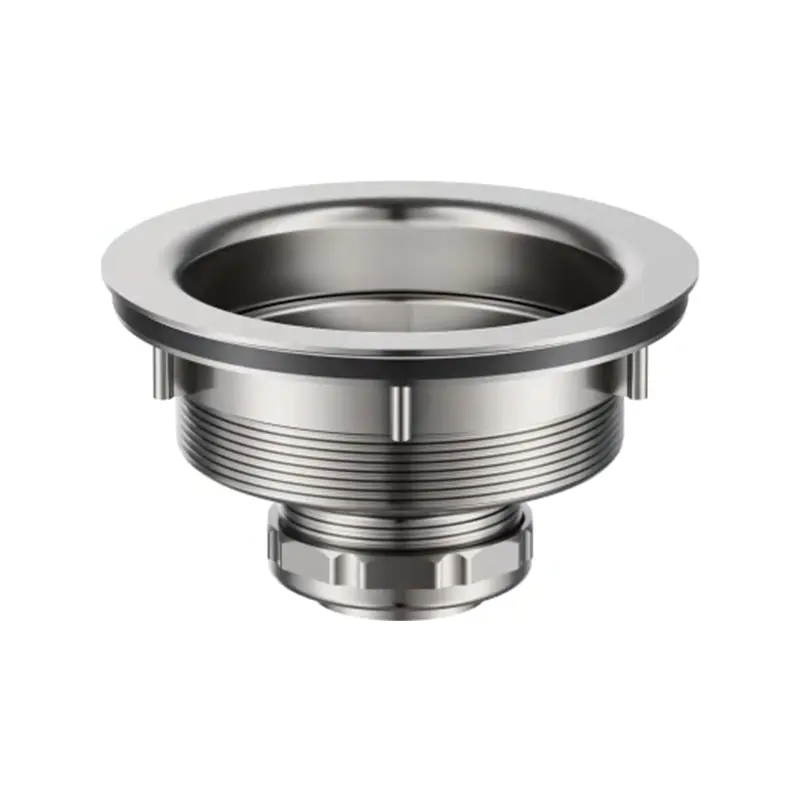
Stainless steel, usually grade 304 or 316, offers excellent corrosion resistance and requires no plated finish to protect it. Grade 316 performs better in coastal or chemical-rich environments. Stainless drains suit commercial and industrial settings and modern bathrooms with a brushed or polished look. They are durable and hygienic, although they can show water spots and fine scratches.
Zinc Alloy
Zinc alloy is a cost-effective material that is easy to cast into complex shapes. It is widely used in mass-market drains. It can be plated attractively, but it is less resistant to corrosion and mechanical stress than brass or stainless steel. For high-use or high-humidity applications, it is usually not the best long-term option.
Plastic (ABS, PP, PVC)
Plastic components are common in tails, traps, nuts and budget drains. They do not corrode and are inexpensive, but they can become brittle with age and may deform if overtightened. A chrome-plated ABS flange imitates metal at lower cost, though the plating can wear. Many reliable drains combine a metal flange and body with plastic inner parts to balance cost and performance.
Ceramic and Stone Finishes
Some designer drains use ceramic or stone-effect caps to match a basin exactly. These are decorative upgrades that sit on top of a functional metal body. They offer a unified look, but a chipped cap is difficult to repair, so they suit low-traffic residential applications.
Finishes
Common finishes include polished chrome, brushed nickel, matte black, brushed gold, brushed brass, white and gunmetal. When choosing, match the drain to the faucet and accessories for a coordinated result. Matte black and brushed gold are fashionable but may be more sensitive to abrasive cleaners. PVD (physical vapor deposition) coatings generally resist scratches and tarnishing better than ordinary electroplating.
| Material | Durability | Corrosion resistance | Cost level | Typical use |
|---|---|---|---|---|
| Brass | Very high | High (with good plating) | Medium to high | Premium residential, hotels |
| Stainless steel | Very high | Very high | Medium to high | Commercial, industrial, coastal |
| Zinc alloy | Medium | Medium | Low | Budget retail products |
| Plastic (ABS, PP) | Low to medium | High | Low | Internal parts, economy drains |
Sizing and Compatibility
A drain that does not fit is useless, so measurement matters. Sizing involves several dimensions, and different regions use different standards.
Outlet Hole Diameter
The hole in the basin is the first constraint. Standard bathroom basins in many markets have outlet holes between 32 mm and 40 mm, while a typical North American bathroom sink opening is about 1-1/4 inches (roughly 32 mm) in the sink tailpiece and around 1-1/2 inches for kitchen applications. The flange must be larger than the hole but small enough to sit within the basin recess. Always measure the actual hole instead of relying on the nominal size.
Flange Diameter
Flanges for bathroom basins are commonly 60 to 70 mm across, with some designer styles reaching 80 mm or more. The flange should sit fully on the flat recess around the hole. If the recess is smaller than the flange, the drain will tilt and leak.
Thread Size and Standard
Thread is where compatibility often fails. In the UK and much of Europe, basin wastes generally use a 1-1/4 inch BSP thread for the tailpiece connection and fit 32 mm waste pipes. In North America, bathroom sink drains typically use 1-1/4 inch NPS or similar sizes, and kitchen sinks use 1-1/2 inch. Always check the thread and connection standard of the trap or waste pipe that will connect below.
Body Length and Basin Thickness
The threaded body must be long enough to pass through the basin and engage the locking nut. A thin porcelain basin may need a body of 30 to 40 mm, while a thick stone or solid-surface basin can require 60 mm or more. Vessel basins and countertop installations sometimes combine basin thickness and countertop thickness, so measure the full depth. Some drains offer adjustable or extendable bodies to cover a range.
Trap and Waste Pipe Connection
The drain tailpiece connects to a trap, which holds a small amount of water to block sewer gases. Check that the tailpiece diameter matches the trap inlet, and that the final waste pipe can run to the building drain with adequate slope. Typical waste slopes are around 1 to 2 percent, or about 1/4 inch per foot in many codes. Always follow local plumbing regulations.
Key Selection Criteria
With the technical background in place, the following criteria help narrow down the best product. Treat them as a checklist during specification or shopping.
Basin compatibility
Confirm overflow or no overflow, outlet hole size and basin thickness before anything else.
Operation style
Choose pop-up, push-button or grid based on user needs and the look of the room.
Material quality
Prefer brass or stainless steel for wet, high-use or commercial environments.
Finish and match
Coordinate with the faucet, towel rails and accessories for a unified appearance.
1. Compatibility With the Basin
This is the foundation. Check whether the basin has an overflow, measure the outlet hole, and confirm the thickness at the rim of the outlet. Take the basin manufacturer's recommendation into account, since some ceramic makers supply or specify a particular waste. Using the recommended type usually avoids fit problems and warranty disputes.
2. Operating Style and User Needs
Think about who will use the basin. In a family bathroom, a pop-up or push-button waste lets children fill the bowl for washing. In a public washroom, a grid waste prevents flooding, vandalism and misuse. In a care home or hospital, hands-free or simple designs support accessibility and hygiene. In a guest bathroom, a push-button waste offers an elegant appearance with minimal upkeep.
3. Drainage Performance
The interior diameter and smoothness of the waste affect flow. A narrow throat or a stopper that sits high in the opening can restrict flow and cause slow drainage. Look at published flow rate data when available, and favor designs with a wide, smooth bore. For basins that tend to splash or hold long soaks, a design with a generous opening reduces overflow risk.
4. Material and Construction Quality
Inspect the product. Good drains feel solid, with clean threads, tight tolerances and even plating. Poor drains have burrs, loose-fitting parts, thin plating and flimsy springs. Brass bodies and stainless steel springs reflect good engineering. If possible, request material certifications from the supplier, especially for projects that require compliance with drinking water or lead-content regulations.
5. Sealing System
Leaks usually start at the seals. A quality drain includes thick, resilient gaskets that conform to the basin surface. Silicone gaskets generally last longer than cheap rubber, which can harden and crack. Some designs have double seals for added security. For stone, glass and solid-surface basins, check that the seal is designed for the specific material.
6. Ease of Cleaning and Maintenance
Hair and soap scum are the main enemies. Stoppers that lift out for cleaning, or caps that unscrew easily, save repeated plumber visits. A hair-catching feature, such as a removable strainer basket, can protect the pipe below. For busy commercial settings, fewer moving parts mean fewer service calls.
7. Aesthetics and Finish
The drain is small but visible. A mismatched finish stands out, especially against a quality faucet. Consider the style of the basin: a round flange suits a round bowl, and a square cap may look better on a rectangular design. Some drains offer a low-profile or flush cap that sits level with the basin surface for a seamless appearance.
8. Standards and Certifications
Compliance gives confidence. Depending on the market, look for conformity with standards such as ASME A112.18.2 and A112.18.1 in North America, or relevant EN and BS standards in Europe and the UK. Water-contact materials may need approvals such as NSF/ANSI 61 or WRAS. Commercial and public projects usually require documented compliance.
9. Price and Lifecycle Cost
The lowest purchase price is not always the lowest total cost. A cheap drain that leaks in a year can cause cabinet damage and labor costs far above the price difference. For residential renovation and mid-range projects, a mid-priced brass or stainless unit usually gives the best value. For large-volume commercial work, standardizing on a single reliable model also simplifies spare parts and maintenance.
10. Warranty and Support
A clear warranty and available spare parts suggest a manufacturer stands behind its product. Check whether replacement stoppers, gaskets and springs can be bought separately. This is especially useful for hospitality and property management, where many identical units must be maintained over years.
Installation Essentials
Even the best drain will leak if installed poorly. The procedure is straightforward, but attention to detail is important. The steps below describe a typical installation for a basin with or without overflow.
- Prepare the surfaces. Clean the outlet hole and the recess around it. Remove old sealant, dirt and soap residue so the new seals can bed properly.
- Test fit the drain. Insert the flange and body without sealant to check alignment, body length and, for overflow basins, the position of the slot.
- Apply sealant or gasket. If the manufacturer calls for a bead of silicone or plumber's putty under the flange, apply a thin, even ring. Do not use putty on stone or porous materials, since it can stain; use a neutral-cure silicone instead.
- Seat the flange. Press the flange into the recess so the sealant spreads evenly. Make sure it sits level.
- Fit the underside seals. From below, slide on the rubber washer or gasket, then thread the locking nut. For overflow basins, make sure the slot faces the overflow channel.
- Tighten carefully. Hold the flange so it does not twist, and tighten the nut firmly. Stop when the seal is compressed. Over-tightening can crack ceramic or distort plastic.
- Connect the tailpiece and trap. Attach the tailpiece to the trap with the supplied nut and washer, checking that the alignment is straight and free of strain.
- Connect the stopper linkage. For pop-up types, attach the pivot rod and clevis strap, then adjust the height so the stopper seals fully when closed and lifts adequately when opened.
- Test for leaks. Fill the basin, then release the water and inspect every joint with a dry tissue. Repeat with the overflow active, if there is one.
Professional tip
Hand-tighten threaded plastic connections and add a quarter turn with a tool at most. Plastic threads strip easily, and a gently tightened joint with a good washer will seal better than a forced one.
Maintenance and Troubleshooting
Regular care keeps a basin drain performing reliably. Most problems have simple causes, and many can be fixed without replacing the whole unit.
Slow Draining
The most common cause is a partial blockage of hair, soap and toothpaste around the stopper or in the trap. Remove the stopper, clean it, and clear the trap. A small drain brush or a plastic drain tool helps with hair. Avoid pouring strong chemical cleaners regularly, because they can damage seals and plating. If the problem returns often, check that the waste slope and venting are adequate.
Leaks Under the Basin
First, dry every joint and fill the basin to find where water appears. A leak at the top of the locking nut usually points to a worn or poorly seated gasket. A leak at the trap connection often means a loose nut or a missing washer. Disassemble, clean the sealing faces, replace worn gaskets and reassemble with a fresh bead of sealant if required.
Stopper Does Not Hold Water
For pop-up drains, adjust the linkage so the stopper drops fully and seals. For push-button drains, check for debris preventing the cap from seating, and test that the spring still latches. A worn rubber seal around the stopper is easy to replace and often restores full performance.
Push-Button Stuck or Not Clicking
Debris or soap build-up inside the mechanism is the usual cause. Unscrew the cap, rinse it in warm water, and lightly lubricate moving parts with a silicone-based lubricant. If the spring is deformed or corroded, replace the cap assembly.
Odors
Unpleasant smells often come from biofilm on the underside of the stopper or inside an overflow channel, or from a dry trap that no longer holds a water seal. Clean thoroughly with warm water and a mild cleaner, flush the overflow channel with a small brush, and run water through the basin if it has been unused for weeks.
Finish Damage
Avoid abrasive pads and harsh acids, which can remove plating and leave dull patches. Wipe with a soft cloth and mild soap, then dry. Black and brushed gold finishes may need extra care, so follow the manufacturer's cleaning guidance.
Notes for Specifiers and Buyers
For contractors, designers and procurement teams, the decision goes beyond a single product. Specifying the same drain across dozens or hundreds of rooms requires consistency, reliable supply and clear documentation.
Standardize Where Possible
Using a small number of drain models across a project makes installation faster and simplifies spare part stocking. If a development uses multiple basin types, choose drains that cover them with minimum variation, such as one model with adjustable body length.
Request Samples and Test Them
Before committing to a large order, test a sample on the actual basin. Check fit, operation, sealing and finish. Run repeated open and close cycles for push-button models to assess mechanism feel and reliability. Compare the finish against the faucet under real lighting.
Check Documentation and Compliance
Ask for test reports, material declarations and certificates relevant to your market. Reputable manufacturers provide dimension drawings, installation instructions and a clear packing specification. This information reduces mistakes on site and supports approvals on regulated projects.
Packaging and Logistics
Good packaging prevents scratches and lost parts in transit. Individual protective bags, labeled boxes and a complete parts list make site handling easier. For bulk orders, confirm lead times, minimum order quantities and the option for custom finishes or branded packaging.
Think About Long-Term Service
In hotels, student housing and rental properties, drains are touched thousands of times. Select robust mechanisms, easy-clean designs and materials that tolerate frequent cleaning. Keeping a small stock of spare stoppers, gaskets and nuts reduces downtime when something fails.
Frequently Asked Questions
A pop-up drain is operated by a lift rod and linkage, usually behind the faucet. A push-button drain has a spring-loaded cap that you press to close or open, with no external rod. Push-button designs look cleaner, while pop-up designs are common and easy to service.
Can I use a drain meant for a basin with overflow on a basin without one?
It is not recommended. A slotted waste in a non-overflow basin can leak or collect stale water in the open slot. Use an unslotted waste designed for non-overflow basins.
How do I know what size drain I need?
Measure the diameter of the outlet hole, the thickness of the basin around it, and check the thread standard of your trap or waste pipe. Match these to the product specification. If unsure, bring the old drain to a supplier or send its measurements to the manufacturer.
Which material lasts longest?
Solid brass with quality plating and 304 or 316 stainless steel are the longest lasting choices. Zinc alloy and plastic can work for light use, but they are less durable in demanding conditions.
Do I need plumber's putty or silicone?
That depends on the drain and the basin material. Many modern drains rely on gaskets and need no putty. For stone or porous surfaces, use neutral-cure silicone rather than putty, which can stain. Always follow the manufacturer's instructions.
Why does my basin drain slowly even after cleaning?
Persistent slow drainage may come from a partial blockage further down the pipe, inadequate slope, a restrictive stopper design or poor venting. Inspect the trap and waste pipe, then consult a plumber if the problem continues.
Is a grid drain a good choice for a home bathroom?
It can be, if you never need to hold water in the basin. For households that fill the bowl for shaving or washing, a pop-up or push-button drain is more practical.
How often should a basin drain be replaced?
A good-quality drain can last 10 to 20 years or more. Replace it sooner if the finish is damaged, the mechanism fails, or leaks persist after replacing gaskets.